Frolic

Saturday, October 29, 2022

When I'm Not Sewing - SEAGLASS (making jewelry)

 A girl can't sew ALL the time.  Right now, this is my latest jam - making jewelry from seaglass I collected in France and England.  I can loosely connect it to the theme of this blog because it is about repurposing - old glass discarded and tumbled in the sea for decades washes up on the beach where it is picked up and turned into wearable art.

In Sept 2019 I collected a handful of these large pieces of seaglass, some of them still a little rough, 
on the coast of Brittany

In Aug 2022, I collected these small, smooth "well done" nuggets at Seaham, on the NE coast of England

(All the glass in my collection was picked up in two afternoons - one in France, one in England)

These pieces of seaglass look like jewels to me, so of course I wanted to make them into jewelry although that is something I've never done before.  But why not?  I might as well give it a try!


First of all, though, I did have a few pieces professionally set into jewelry.  I had a gold ring I was given 40 years ago and the freshwater pearl was crumbled so I had it replaced with a tiny piece of seaglass.  

And I had a couple of pair of earrings custom made.
Amazing that you can find perfectly matched sets from seaglass you randomly pick up on the beach!


Then I stocked up on basic jewelry making supplies, got some diamond tips for the Dremel (to drill holes in the glass for the earrings and pendants) and got to work. Wire wrapping is an easy technique although it takes a little practice. I used the cheap stuff for most of this, because I'm just learning how to do it.

This ring turned out the best, I made it with sterling silver wire - after I made a couple of practice rings.  
I LOVE THIS RING!


Here are a couple more experiments 

This was made with a beautiful multi-colored piece of glass


Bright green nugget from England


Big piece is from France, the nuggets from England, but they match pretty well


These are all from England

These are all from France


The blue in the middle is from England, the other two from France


Both of these from England - the yellow was very rare, and I didn't have another to match it, but it was the same size and shape as this green one, so I made a mismatched pair.


Once I got the hang of drilling the glass (there are some tricks to this) I got hooked and couldn't stop.  And I am already thinking of where I will go to hunt my next batch of seaglass... 

Monday, June 27, 2022

How to Miter Corners for Placemats the EASIEST POSSIBLE WAY! (I Promise!)

 So, I watched a few YouTube tutorials on how to make mitered corners for placemats, and all I could think was that it really shouldn't be THAT complicated.  And guess what - it really isn't!  


They always say give a task to a lazy person and they will figure out the easiest way to do it, so here is me waving my hand and volunteering!  


My mom gave me some vintage linens and asked if I could make them into placemats.  I cut out the cute embroidered parts (the Days of the Week) and chose a green gingham for the back/border.  Then I figured out the E-Z way to miter it.

1.  Figure out the width of your border and cut your backing accordingly.  Here I am allowing 2" because the finished border itself will be 1-1/2" + a 1/2" hem.

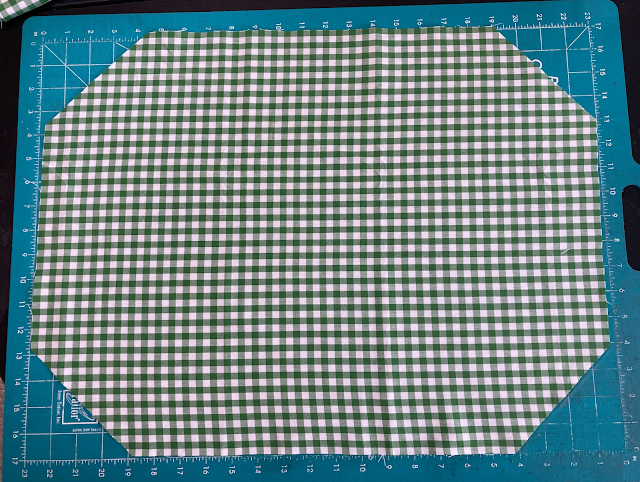
So, I have cut the backing 2" bigger than the main fabric all around.

2.  Now double the width of your border - so 4" in this case - and you will cut out a triangle on each corner with this measurement. 


And it looks like this...


3.  Fold the cut edges of each corner right sides together as shown below 


And turn back your hem allowance on the long edge - I used 1/2" here.  
(The gingham fabric really makes it easy to measure since each square = 1/4")


4. Now sew across that edge with a 1/4" seam allowance


And clip off the point

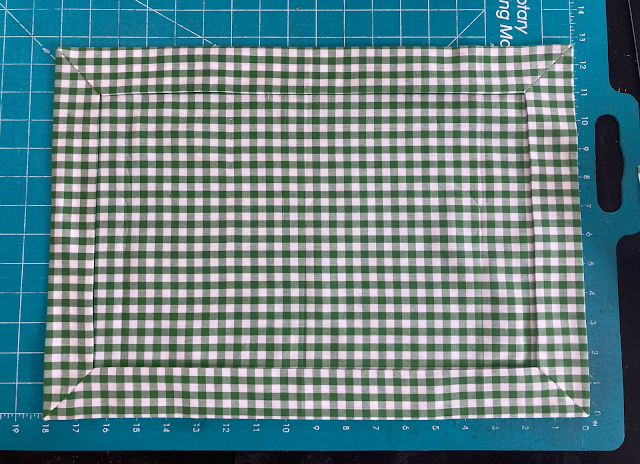
Do this on all four corners and then you will have kind of a "tray" looking piece


5. Turn all the corners inside and poke them out nice and sharp


The edges will naturally roll in, since you sewed your hem down at the corners


6. Press the hem all the way around, and you're done!


Now, insert your main fabric into this mitered "frame" and you can proceed to quilt it or finish it however you like.  And of course you will stitch all around the edges of the opening. 

Honestly, how easy is this?

Sunday, June 5, 2022

Kenmore 158.1941 - An All-Metal Wonder Machine

So apparently the 158.1941 is one of the last of Kenmore's high-quality, all-metal machines. You've got to hand it to Kenmore, though, they held out at least a decade longer than Singer which rolled out its last all-metal geared machine* in the late 1960s (the early 600 model Touch & Sews.)

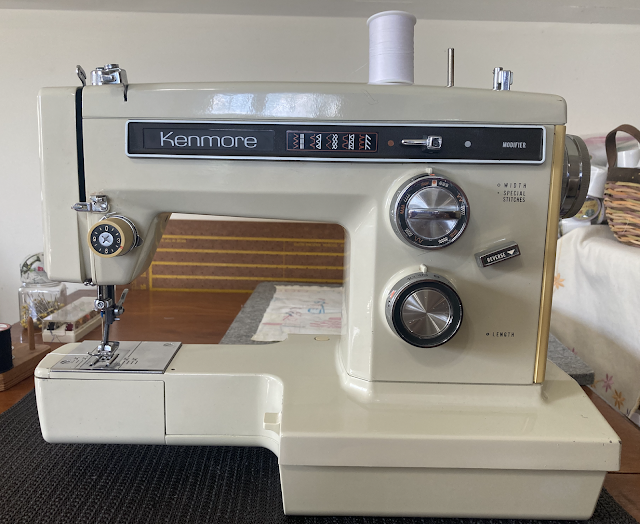
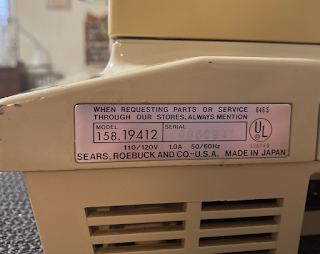
Kenmore 158.1941 - a quality, well built, all-metal machine and the end of an era.

A rare all metal American branded free-arm machine


The 1941 has 10 built-in stitches, including reverse stretch stitches (in white) but doesn't take cams.  
Note:  the 158.1760 is exactly the same machine as this one, except that it does take cams. 

Here are the specs for the Kenmore 158.1941

  • 1.0 amp motor
  • Vertical oscillating hook/Class 15 bobbin 
  • Super high shank/Center-homing needle
  • Convertible flat-bed to free-arm
  • 10 built-in stitches, including reverse stretch stitches
  • Presser foot pressure adjustment
  • Feed dog drop
  • Twin needle stitching
  • Dual belt system (gives better torque, eliminates slippage, and maximizes punching power)
  • Easy "slot" threading
  • Pop out clutch release

What it DOESN'T have:

  • L-C-R needle positions
  • Integrated buttonhole stitch***
  • Cams for decorative stitches**
  • Chain stitching**
 
I've gotta say, this machine has some serious chops when it comes to heavy sewing projects.  Looky here...

This is eight layers of denim, and the machine stitches effortlessly - perfect back and front


And the free-arm makes this the perfect machine for hemming jeans.  I didn't even bother to use a hump jumper, and it still sewed right over the seam crossings without skipping a stitch.

It does well with heavy threads - no complaints about stitch quality.

Although I didn't particularly want a super high shank (SHS) machine, I am okay with this one because it did come with all the basic feet.  There are limitations, though. For example, a SHS walking foot or other speciality feet can be hard or impossible to find. 

Basic accessories that came with the machine include a straight stitch needle plate insert, a variety of feet, and Q-needles!

This machine has SHS feet, but one nice thing is that they are very easy to switch out - just pop down that lever in the back and it releases the foot.  Slide the new one in and pop it back up.  (So why do you have to use a SCREWDRIVER to change the needle???)

BOTTOM LINE:  While this is an excellent, high-quality, all metal machine, it does have a few limitations.  It comes with the clumsy Kenmore buttonholer which involves installing a plate with a pinion gear and then attaching the plastic buttonholer guide and inserting a template for your buttonhole sizes.  I've never been crazy about that system, and wish this one had a built-in buttonhole stitch.  

But overall a nice machine, very well built, and sews beautifully - what's not to love?


*the "all-metal" refers to the feed, hook, and top gears, but there were fiber gears in the handwheels of some of these older machines which was almost never an issue

** I have these features on my 1774

*** I have this feature on my 1050

Friday, April 15, 2022

The Kenmore Q-Foot and Q-Needle. Any Q-uestions?

 I couldn't resist the Q humor - but the Q-uestion is this - do the much ballyhooed Q-foot and/or Q-needle live up to the hype?

It seems that every vintage Kenmore owner covets a set of these.  They were intended to sew the super stretchy fabrics that were popular in the 1970s, including Qiana (which is supposedly what the "Q" refers to.)


The foot is hard to explain and I don't know for sure exactly how it works, but this is what it looks on the bottom.  There must be something in the design that reduces drag on the clingy stretch fabric - that is my guess. The needles, I suppose, are equivalent to today's ballpoint needles intended to sew stretch fabrics.  

Q-foot and Q-needle on low shank Kenmore machine

I tried stitching with the Q needle, a regular sewing needle, and a modern stretch needle on this super stretchy knit. (Using the Q foot with each one.)

Red = standard all purpose needle
Green = modern ballpoint needle
Blue = vintage Q needle
          There is no difference between the various needles using this foot.  

             The stitch quality is identical. 

Even the bobbin sides all have the same good results.

Since I don't sew with this type of fabric very often, I haven't used the Q-foot enough to give it a thorough review.  But from these test samples, it seems to handle this fabric quite nicely with any needle I use. 


Monday, April 11, 2022

Kenmore Mini Kennies Versus Singer Featherweight

...Continued from Kenmore 1050 and 1030

HOW DO THE MINI KENNIES STACK UP TO THE "OTHER" FAMOUS MINI?


Singer 221 Featherweight

The Featherweight is iconic: the cuteness factor is off the charts and it is the most popular sewing machine ever made.  But for practical purposes, it is basically a $500 straight stitch machine with a relatively low power motor.  Its simplicity really shines for applications like piecing quilt patches where all you need is a perfect straight stitch. There is nothing this machine does better than running up those 1/4" seams with precision and fine control. 

As for straight stitch quality, there is little or no difference.  Can you tell which is which? *

The Kenmore Mini Series, however, are full-service machines.  They do everything you need for full garment construction, including seam finishes and buttonholes with no attachments.  Not to mention, the motors have at least double the amps of the Featherweight (0.8 - 1.0 amp versus 0.4 amp.)  The Kenmores are a little bigger, and weigh a bit more, but are literally twice the machine.

Kenmore 158.1050

So, how much heavier IS the 3/4 size Kenmore than a 1/2 size Featherweight?  Let's start by saying the machines alone are 16 lbs vs 11 lbs.  But there is more than just the actual machine weight to consider. 


Here's the Kenmore 158.1050 in its case with the controller and accessories


                                    And here is the Featherweight all packed up and ready to go.


The weight that matters is the "carrying" weight - what the whole kit and kaboodle weighs all packed up and ready to go - and the wooden FW case is heavier than the plastic Kenmore case.  So including machine, controller, accessories and case the grand totals are...

Kenmore 1050 = 20 lbs 14 oz

Singer 221 = 18 lbs 10 oz

The Kennie only weighs 2-1/4 lb more fully loaded.  

But keep in mind that to get the same range of functions on the Featherweight, you'd have to add in an Automatic Zigzagger and Buttonholer.  Those would bring the weight up to about even - no kidding!

I'm not even going to claim there is a "better" machine than a Featherweight - these machines are the Holy Grail of the VSM world and I don't see that changing any time soon.  So the take-away from this is why not have BOTH? And if you do, trying taking that cute little Kennie to your next quilting retreat and see if it doesn't maybe stand out in a sea of Featherweights!  ;)  


*The Featherweight stitches are pink