
So, I watched a few YouTube tutorials on how to make mitered corners for placemats, and all I could think was that it really shouldn't be THAT complicated. And guess what - it really isn't!
They always say give a task to a lazy person and they will figure out the easiest way to do it, so here is me waving my hand and volunteering!

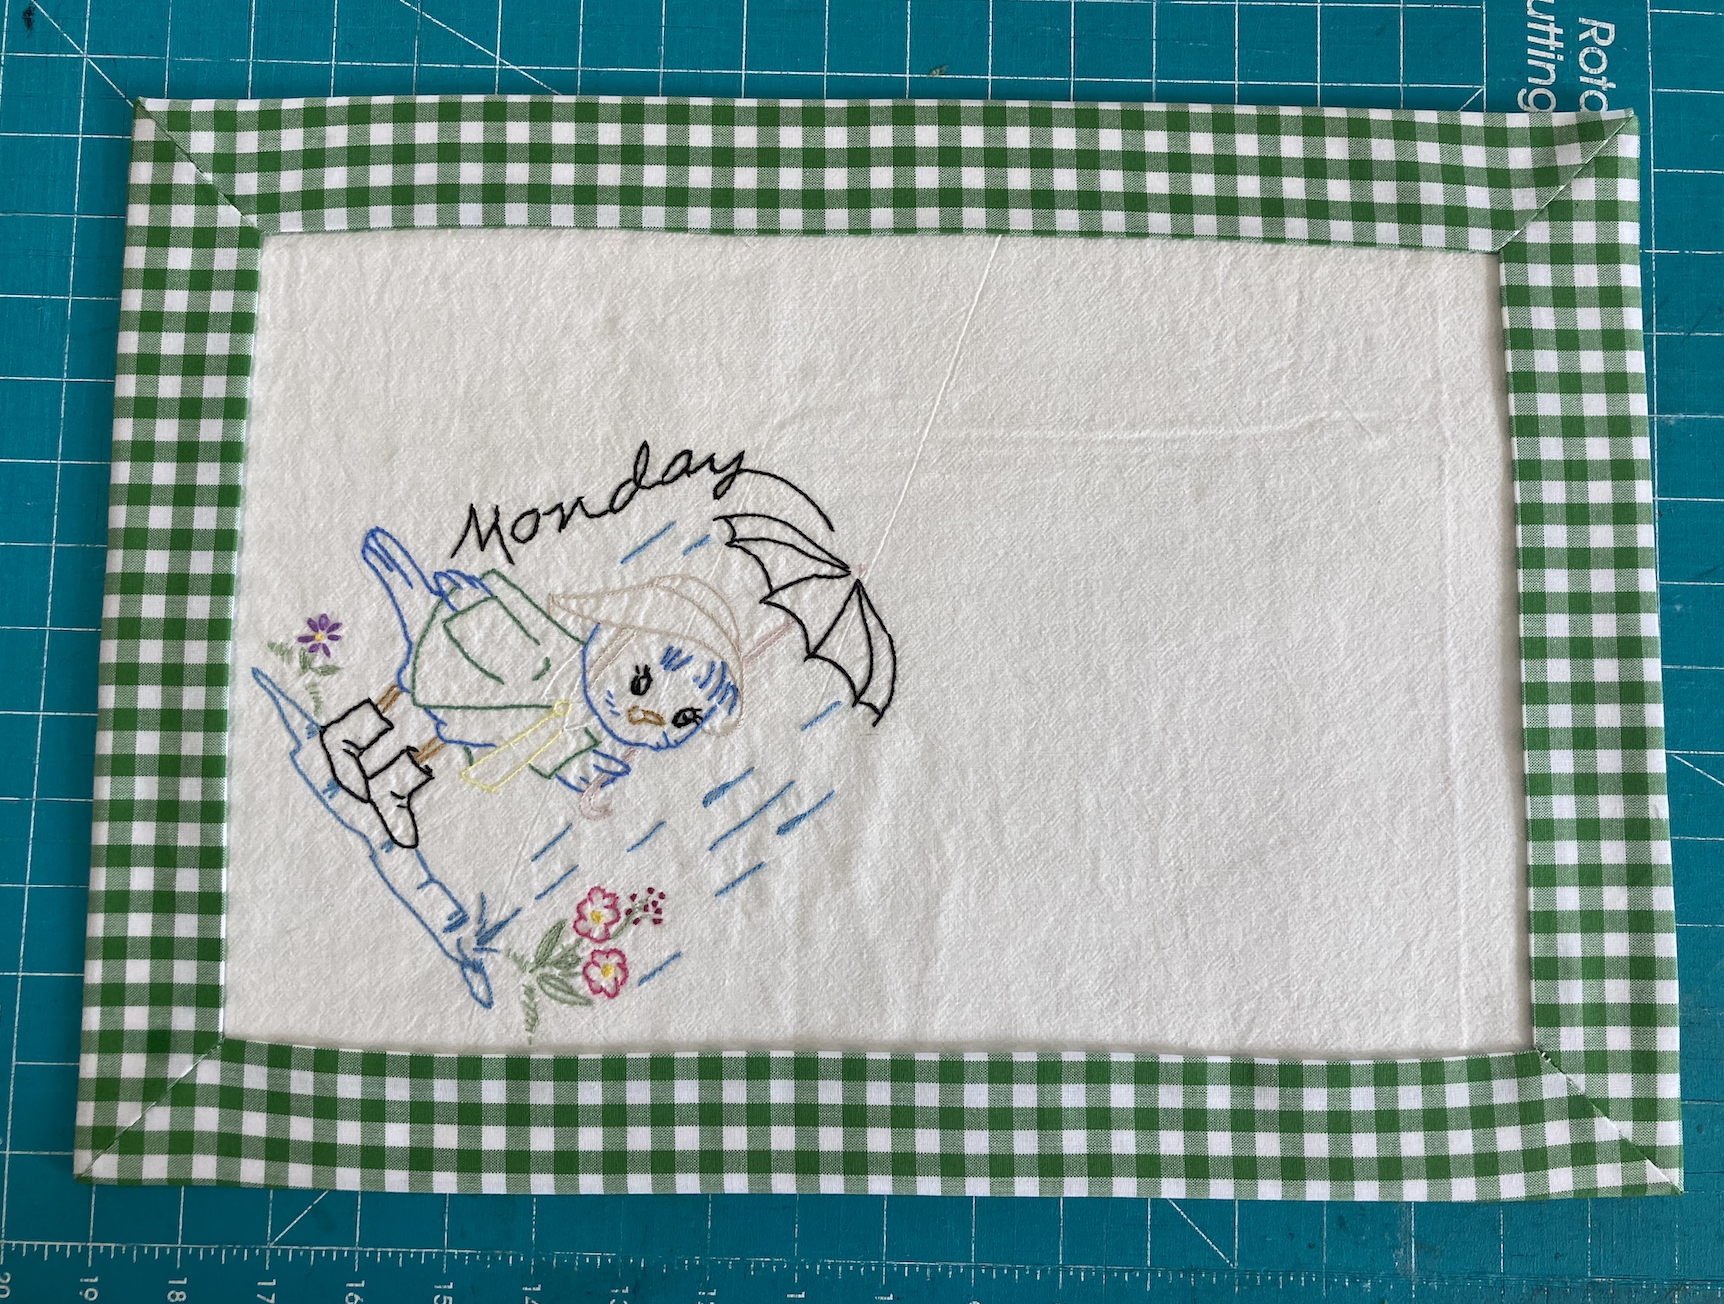
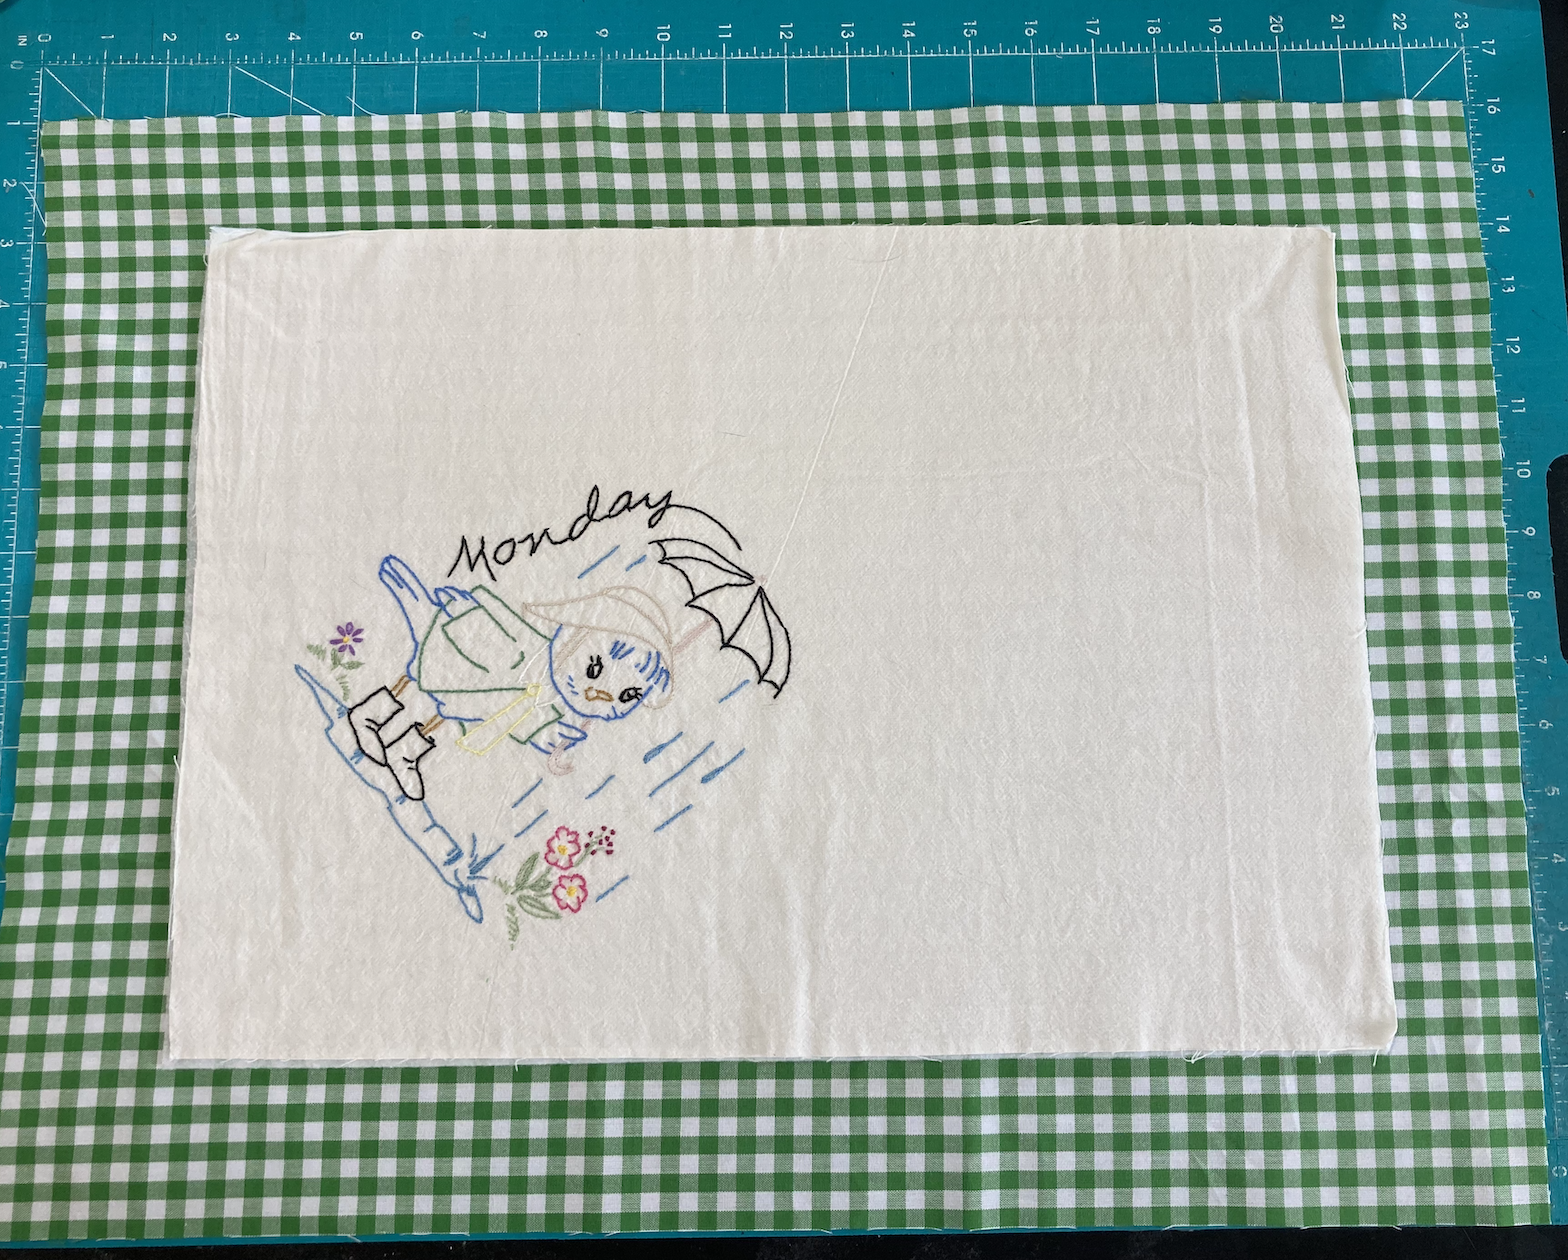
My mom gave me some vintage linens and asked if I could make them into placemats. I cut out the cute embroidered parts (the Days of the Week) and chose a green gingham for the back/border. Then I figured out the E-Z way to miter it.
1. Figure out the width of your border and cut your backing accordingly. Here I am allowing 2" because the finished border itself will be 1-1/2" + a 1/2" hem.
So, I have cut the backing 2" bigger than the main fabric all around.
2. Now double the width of your border - so 4" in this case - and you will cut out a triangle on each corner with this measurement.


And it looks like this...


3. Fold the cut edges of each corner right sides together as shown below

And turn back your hem allowance on the long edge - I used 1/2" here.
(The gingham fabric really makes it easy to measure since each square = 1/4")

4. Now sew across that edge with a 1/4" seam allowance


And clip off the point

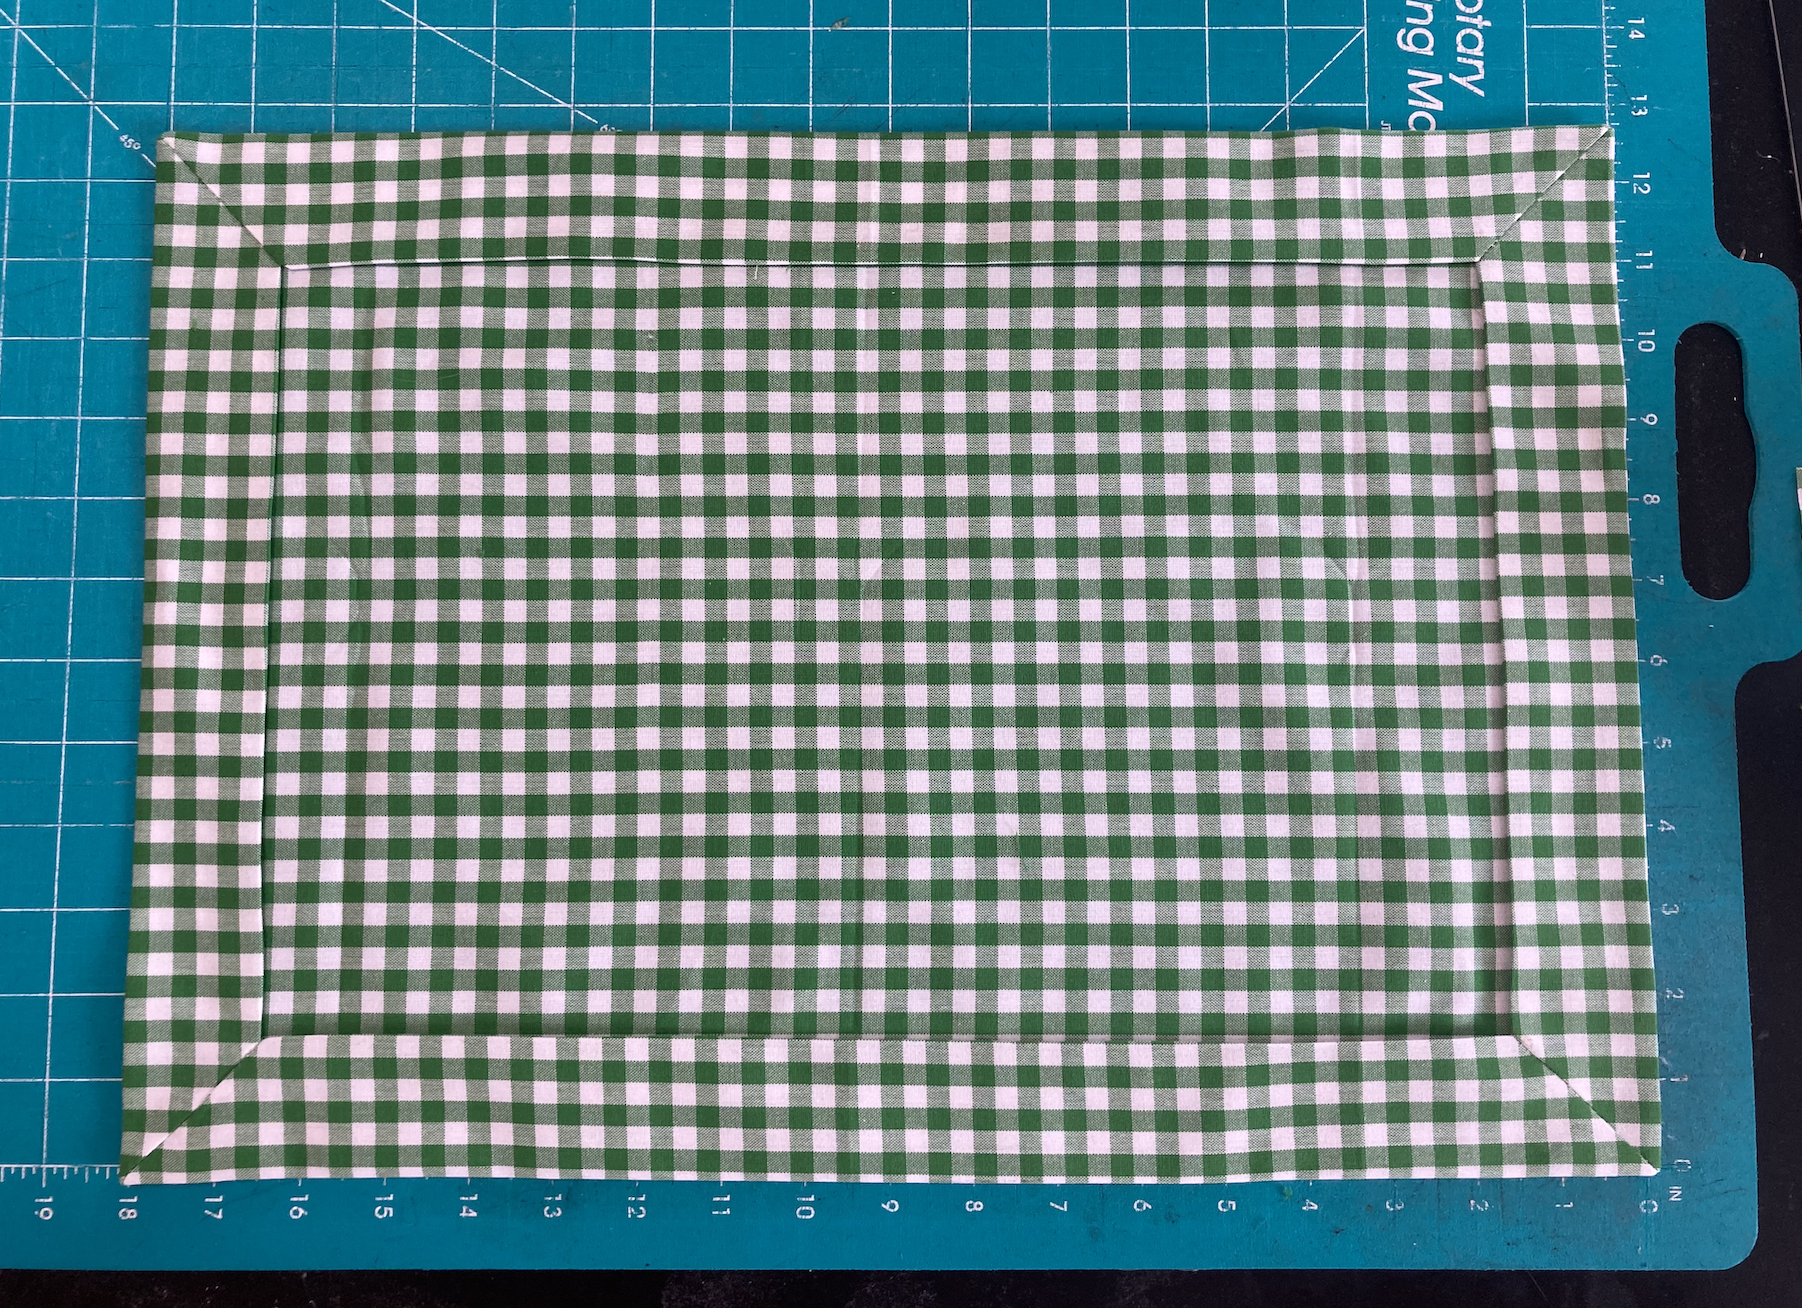
Do this on all four corners and then you will have kind of a "tray" looking piece

5. Turn all the corners inside and poke them out nice and sharp

The edges will naturally roll in, since you sewed your hem down at the corners

6. Press the hem all the way around, and you're done!

Now, insert your main fabric into this mitered "frame" and you can proceed to quilt it or finish it however you like. And of course you will stitch all around the edges of the opening.

Honestly, how easy is this?
No comments:
Post a Comment