Frolic

Friday, December 15, 2023

The Reluctant Quilter Part II - basting, quilting, binding

Continued from The Reluctant Quilter Part I - Piecing the Top 

It doesn't take long to figure out one thing about quilting - piecing the top is the "fun" part.  Well, "fun" if you enjoy cutting out dozens (or hundreds!) of tiny pieces to exact precision, then sewing them together with 1/4" seams to exact precision.  

But it is "fun" and comparatively easy since you are working on small sections at a time.  

Then comes the WORK.  I watched a number of videos about quilt basting methods and finally decided to pin it on the carpeted floor (no pool noodles, ping pong tables, quilting frames or basting spray for me.) 

I pinned the backing onto the carpet with T-pins rather than taping it to a hardwood floor


 Batting hasn't been totally smoothed out yet, but this is the next step


Then the quilt top.  I used 200 safety pins to baste it.  It actually wasn't as bad as I imagined. 


On to the quilting itself.  THIS is the challenge.  Yes, I know at this point you can take it to a quilt shop and they will quilt it on a long arm machine with beautiful fancy patterns.  But 1. that is costly, and 2. the whole point of making a quilt is making it myself.

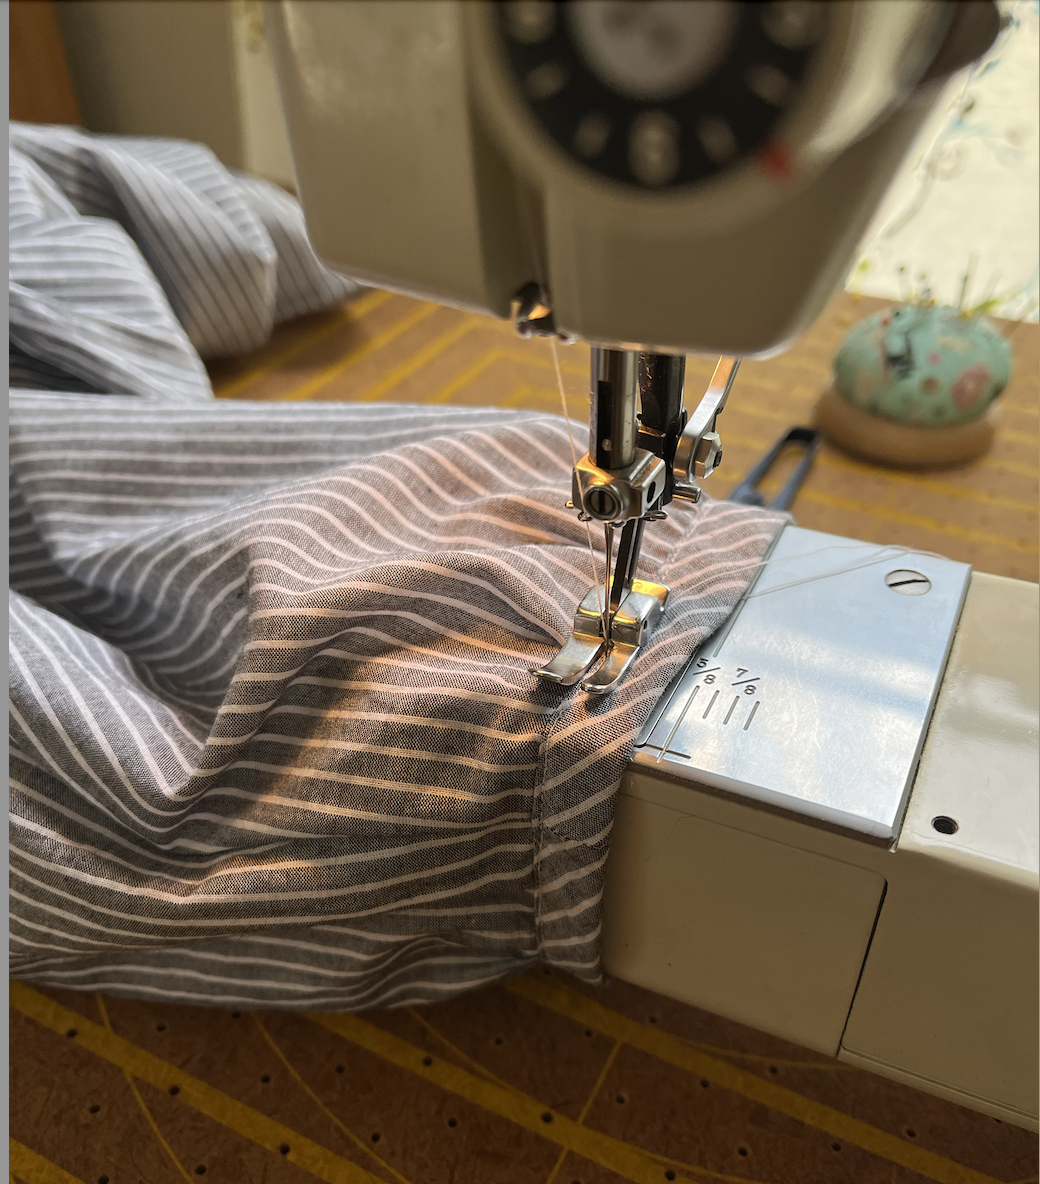
This is the first of what will be MANY lines of stitching.  I am lucky enough to have a SHS walking foot for my favorite Kenmore 1760, and so off I go.  

I used a three-step zigzag stitch to make vertical and horizontal lines across all the squares which are set on the diagonal.  Then I came back and did a straight stitch in the ditch along the diagonal row seams. 

Yeah, I know you need to roll up the quilt so it goes through the machine more easily, but I got tired of rerolling it every time I started a new line.  Too bad I didn't know about THIS product until after I was finished!  


And I'm sorry, CAT PICTURE!  It doesn't make it any easier to wrangle that quilt through the machine when a cat decides it is a cozy spot to sit and look out the window.


I chose NOT to quilt the border, BTW, in spite of being advised to do so.  It is only 3" and I didn't think all those random lines going across in different directions would look good on the border. 

Not perfect, but I got the job done


I pieced my binding from fat eighths, so it is multi-patterned.  I did run the edges through the serger to keep it all neat (I tore the strips rather than cut them - don't ask!) and I only had to undo a few inches on the ends in order to do the final join. 

I did the method where you first sew the binding to the BACK of the quilt


And then turn it to the front and machine stitch it down.  I have no time or patience to hand stitch a binding.  No way/No how.


Here's how it looks front and back, almost the same.  2-1/2" binding strips, and I sewed with a 3/8" seam


This is shown on a queen sized bed


.

PS... This quilt has been Kitty Approved


Monday, December 4, 2023

The Reluctant Quilter - Part I, Piecing the Top

 I have been sewing for more years than I want to admit, and yet I have never made a quilt.  I never WANTED to make a quilt, it just isn't my jam for lots of reasons.

But when a seven year old granddaughter asks you to make her a quilt, then that is what you do.

I looked for a pattern that was 1. FREE and 2. EASY because I have zero patience for anything that requires cutting out hundreds of miniscule pieces of fabric only to reassemble them into an intricate design.  


This is what I chose, but with different fabrics since this collection was no longer available. (The blue lines are how I intend to quilt it)

This looked "easy" because all the squares are the same, two rectangles sewn together. Super simple!

I bought a fat eighth bundle, and cut out 65 printed rectangles.  Since each had to have a matching white rectangle, I figured the easier way to cut those out...
I laid the rectangles out on the background yardage, sewed the seams, then cut them out.  I'll dub this the Cookie Cutter Method. (I know nothing about quilting, this might already be a thing!)  Anyway, this was much faster than cutting out individual rectangles from the yardage, then matching them up to each printed piece.

Then I laid out the blocks to see how it goes together

There are twelve diagonal rows, so once I laid it out, I picked up the pieces of each row in the order to be sewn, and numbered each pile.  Then I stacked up the piles and started sewing the blocks into strips, then the strips into rows

Really, that is all there is to it, and it took a couple of days to sew the top

 I added a 3" border to tie it all together...


I have already cut and pieced my backing and binding. 
Ten yards of binding pieced from fat eighths.

Something tells me that the hardest part is yet to come...the basting and quilting.


Sunday, February 26, 2023

How To Spot a "Vintage" Singer Reproduction

 I just saw this listing on Shop Goodwill, and it caught my eye because it was so shiny, perfect, and beautiful - at a glance, anyway.

Really the first clue this is a reproduction is just that - it is TOO shiny and the decals are TOO colorful.

If nothing else gives it away, look for this - it's hard to see in the photo, but that big black plastic knob on the bed means PHONY.


Look at the metal and the hardware.  These are NOT vintage Singer screws.  Any pot metal on the machine also means it's a fake.

The metal quality is a dead giveaway

And PLEASE - how phony is this? 

 A genuine Singer of that era would have a serial number plate like this.  


The latches give it away, too. It is possible an old case could have been repaired with new latches, but if you could see this in person, you'd see other clues that this isn't a vintage bentwood case. 

PHONY!

(I hope the people bidding on this machine know what they're getting.) 

Thursday, February 16, 2023

Singer Professional Buttonholer for Vertical Needle

 If you have a low shank (vertical needle) zigzag sewing machine of ANY brand, you might consider one of these.

Singer Professional Buttonhole for Vertical Needle zigzag machines

While this is similar to the Singer Automatic Buttonholer for straight stitch, this one works with ZIGZAG machines.  Rather than the attachment moving the fabric back and forth to create the zigzag stitch, the Professional Buttonholer is a smoother operation.

This is the Automatic Buttonholer - it moves the fabric back and forth to make the zigzag stitch


Here is the Professional Buttonholer on a Singer Genie.  Notice that it uses the machine's zigzag, so there is much less movement of the fabric.


Super nice buttonholes, second to none. This one on a Singer 319


The set even includes the eyelet cam - almost impossible to find for the Automatic Buttonholer because it was sold separately 


Wednesday, February 15, 2023

Kenmore 158-1760

UPDATE: This was a most recent challenge which my Kenmore tackled and won (finally!) I made these denim shorts on the machine and struggled with the last step - sewing down the belt loops.  This solution worked, sewing across a folded piece of fabric and then onto the belt loop end.  So with this "win" there is still nothing this machine can't do!  


 I've been through more Kenmores than I can count in search of the ultimate model (not all of them are included on this blog.)  Every time I think I've found the best machine, I seem to find one just a little better.

Kenmore 158.17600

First, to recap, the 158.1941 is often referred to as the best machine in its category that Kenmore ever made.  And it is a very fine machine, which is why I raved about it in a previous post. It only lacks a few features to keep it from being "perfect":

1. It doesn't take cams
2. It doesn't have L-C-R needle positions 
3. No built-in buttonhole stitch

Well, as for #2, I've never seen that on any vintage Kenmore (so far, anyway.) But imagine my surprise to find that the 1760 is exactly the same machine as the 1941 but also takes cams, bringing it at least one step closer to perfect.


Yes, I can sew little duckies, trees, flowers and hearts on this machine!  (Clearly, I am easily entertained in my old age.)

When I say exactly, I do mean it is EXACTLY the same as the 1941 in every way except for the cam feature (and there is a different top thread guide to keep the thread clear of the cam lid.)
                               Kenmore 1941 (left) and 1760 are otherwise identical in every way


                  Of course one of the best features is the free arm which I use when sewing bags
                                                          Topstitching on a crossbody bag

I used to resist super high shank (SHS) machines because the feet and accessories are not as easy to come by as low shank models.  But now that I've gradually assembled a good collection of feet (supplemented by a SHS adaptor which allows you to use some- but not all - low shank feet.)  I'm more enthusiastic.

Yes, I even have the SHS walking foot, which was a splurge

I used this machine to make a blouse and enjoyed every minute of sewing on it. One thing I love is that with the straight stitch plate, you can start on the very edge of your seam with even the finest fabric and this machine doesn't choke - like most Kenmores I've used, it has excellent piercing power at slower speeds.  Although we usually use thick layers of heavy fabrics to demonstrate a machine's prowess, the performance on more delicate fabrics is just as important.  I'm pleased to say this machine handles both beautifully.  


Sunday, February 12, 2023

Review for Butterick 5861


I've spent more time recently collecting sewing machines and gadgets than actually sewing, so I dusted off an old pattern that's been in my collection for a while now.  I liked it so much, I made it twice! 

Butterick 5861, View D


The first is an inexpensive lightweight cotton shirting I bought at JoAnn. 

Then after my "working muslin" I made the second top out of pricey Liberty Tana lawn. (I probably wouldn't have paid as much for a blouse RTW as I paid for this fabric!)

I enjoyed making the tucks and also playing with the stripes

Tuck detail  - notice the tucks are CURVED.  The stripes help point this out.


The back detail is a little different. These loose tunic tops are often shapeless and baggy in the back and this makes it a little more fitted.  You sew rows of shirring with elastic thread between the darts.

I sewed this blouse on my recently acquired Kenmore 1760 which is my "new favorite" machine. 
Kenmore 158.1760

As for the construction, this is a simple pattern, very easy to sew. It is a little time consuming to make the tucks and shirring, but those details add to the interest so I enjoyed the process. Once those two details are done, the rest goes together quickly - it even has easy raglan sleeves for those who hate to do set in sleeves.

However, there is a mistake in the pattern which will slow you down if you're not aware of it. The illustration shows the shoulder yoke applied BACKWARDS. The longer, sloped edge goes to the front of the garment (corresponding with the single notch) and the shorter perpendicular edge goes to the back (corresponding with the double notches). The illustration in the instructions shows it completely opposite. 


Another mistake in the instructions concerns the neck binding. You cut a 1-1/2" bias strip then you are directed to press one edge in at the seam line (5'8") and trim it to 1/4".  Then you sew the binding onto the neckline with a 5/8" seam allowance, and turn the folded edge over the seam.  WRONG!  Simple math tells you it isn't possible, since 5/8" x 2 = 1/1-4"  That leaves barely 1/4" to cover the seam edge - it won't work. Take my word for it: press one edge in 1/4" (do NOT trim anything!), sew the strip onto the neckline with your 5/8" seam allowance, trim the seam to 1/4", and your binding will fold over and cover it perfectly and look just like the illustration.

(Ditto the binding on the cuff - I did NOT trim the strip as directed and it was perfect.)

Speaking of cuffs, this is where that free arm really shines!
I have to admit, this is a pretty nice feature

The only thing I didn't do on the Kenmore was the buttonholes. The Singer Professional Buttonholer on my Slant-O-Matic is just better at buttonholes all the way around (no pun intended!)  
The green buttonholes on this sample were done on the Kenmore