Frolic

Monday, March 14, 2022

Quilting Just Doesn't Work for Me (but I can knit!)

I've been sewing for decades (I won't admit how many, but it's a lot.)  I've sewed garments, costumes, dolls/doll clothes, accessories of all kinds, home dec, even a patio umbrella (no kidding!)   My favorite thing to make right now is bags and purses

But I simply cannot quilt - as in making an actual quilt, that is.

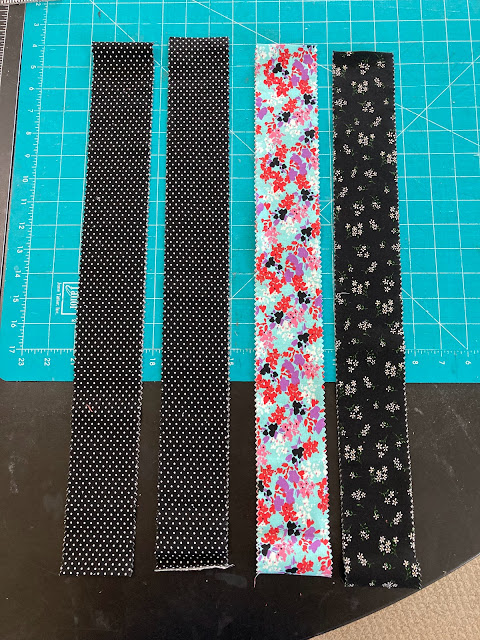
Here is a handful of small items I have "quilted," and that is only in the simplest possible form:


A  couple of simple table runners using QAYG 

I got some practice with binding on this little piece.  Simple but cute and useful.


Super simple "quilting" - this is about my speed!


But darned if I can make one simple quilt block and get it right.


It took me THREE TRIES to get ONE BLOCK the right size for a community quilt project!
At that rate I could finish a quilt in maybe 8-10 years...


Then a half finished quilting project was bequeathed to me, and I felt I had to give it a go.  I carefully made a block.  This took a whole afternoon to make, piecing it on my Featherweight (that's where this little machine really shines) and using 1/4" foot to get accurate seams.  

But those "scant" 1/4" seams?  No can do.  An afternoon of tedious sewing only to end up with a 9-1/4" block and a few wonky squares in my checkerboard.


Talk about TEDIOUS!

No way would I ever do the 99 squares required for the entire quilt - then attempt to quilt it and bind it.  

The truth is, I'm just not motivated to complete a quilt, and motivation is what it takes to master a skill.  (Let's be honest, I could complete a quilt if I really, really wanted to but I just don't.)


It all comes down to MOTIVATION

Each of my four grandchildren has at least one (or more) sweaters I knit for them.  No knitting is too tedious for me!  You'd think if I could do this, I would have the patience to make a quilt.

Go figure... 

                      This was a super simple, quick and easy pattern that I made on the fly.

            The intarsia dinosaur was a little time consuming, but the rest of it knitted up pretty quickly.

This was a real labor of love, and the pure wool yarn was pricey.  But how cute is this!


This is an heirloom quality sweater that took some time to make - knitted in a fine gauge, with a full skirt, an intricate stitch pattern on the bodice, buttonholes, a collar, and fully fitted sleeves.  Not for beginners!


Sunday, March 6, 2022

1 Hour Crossbody Cellphone Purse Made With Jellyroll Strips

 Like most sewers I am beguiled by jellyrolls and other quilting precuts.  However, I don't quilt! (except small items such as table runners, potholders, tote bags, etc.)  Quilting isn't my jam, but I like those tempting little packs of assorted coordinating fabrics and can't resist buying them now and then.

So here's a very quick and easy project using four jellyroll strips and a fat eighth (or 16"x 8" remnant.)  

Any beginner can make this project, and the hands-free cell phone bag is actually pretty useful.  I recently carried one of these when flying because I could keep my phone, ID and boarding pass handy while juggling through TSA.


MATERIALS

Start with four jellyroll strips in three different patterns.  Two of them the same (which will be the strap, d-ring tabs and flap) and two different ones for the main part of the bag.

The piece that will be the strap - one of the black dotted strips - is left full length.   Cut the other three
 strips in half.  


You'll also need the following:  Lightweight and heavyweight fusible interfacing plus hardware as shown 
3/4" D-rings, swivel clasps and slide buckle (optional).  Magnetic snap and 4" piece of velcro


Three half strips (21" long) will be pieced to make the main body of the bag

NOTE:  All 1/4" seam allowances throughout

Seam the three half strips lengthwise, press seams open and interface with a heavy fusible interfacing.


Mark center of middle section with a pin and line up at the 2-1/2" mark as shown above, then cut the pieced strip so that it measures 5" wide (you're cutting 3/4" off each side.)


From the 21" x 5" strip cut into three lengths as shown above:  

  • 2 @ 7" x 5" (for the Front and Back Exteriors) 
  • 1@ 5-1/4" x 5" (for the Front Pocket)  

From a fat eighth (or a 16" x 8" fabric remnant) cut a matching lining for each piece as shown


From the half length of the black dot, cut a 6" and a 9" length as shown above.  

These are all the pieces cut and ready to sew the bag.


PUTTING IT TOGETHER

To construct the bag, you are going to make two units - front and back - which will each have a exterior and lining piece.  These two units will be sewn right sides together then turned right side out.

1.  FRONT EXTERIOR SECTION

POCKET
Making Front Pocket

Make the front pocket as follows:  
  • sew the pocket lining and pocket right sides together along top edge.  Press seam open
  • On back side mark placement for the female side of the snap in the position shown above and install snap.
  • On the right side, sew the soft side of the velcro to the lining about 1/4" from the seam.
  • Turn piece wrong sides together and top stitch along upper edge.

Now sew the hook side of the velcro on the Front Exterior section as shown 
(a glue stick holds it in place while you sew.) 

                         Baste the pocket to the Front Exterior piece with a 1/8" seam.  This section is done.


2.  BACK EXTERIOR SECTION 

STRAP & D-RING TABS
With the 42" x 2-1/2" jelly roll strip, you will make your strap.  With 6" strip, make d-ring tabs

  • Add lightweight interfacing to strip 
  • Fold long edges to meet in the center and press
  • Fold in half lengthwise and press
  • Top stitch 1/8" along each side
  • Using the 6" x 2-1/2" strip, do the exact same thing to make the d-ring tabs (you will cut this piece in half to make the two tabs)

If the short ends of the strap are NOT on a selvedge, dab a little Fray Check on each end


FRONT FLAP
To make front flap
  • Apply interfacing to 9" x 2-1/2" strip
  • Fold in half widthwise, right sides together, and draw stitching lines as shown
  • Mark position for snap on wrong side as shown and install
  • Stitch along stitching lines, cut off the corners, and turn right side out
  • Top stitch 1/8" from edge around flap
Clip your d-ring taps and the front flap right side down on the Back Exterior Section and baste.  This section is now done.


FINAL ASSEMBLY

                Sew Front and Back Exteriors to the linings at the top edges and press seams open.


  • Clip the two units right sides together, matching linings and exteriors, and sew around with a 1/4" seam.  
  • Leave a 4" opening on the side of the lining for turning.  
  • Clip corners, turn right side out and poke out the corners with a chopstick.

Press raw edges of lining opening in, and stitch opening close to the edge.  
(On the side like this, it won't show!)


Tuck the lining inside, give it all a good press and steam (don't press the velcro!) and pop on the strap.

Add a cute button to the flap if you like!


Here's another full size purse I also made from the same jellyroll.