Frolic

Sunday, March 18, 2018

Stretch Stitching on Singer Slant-O-Matic

In response to some buzz on a VSSM group, I dug out my "stretch stitching"* equipment for my 401 and tested it out. 

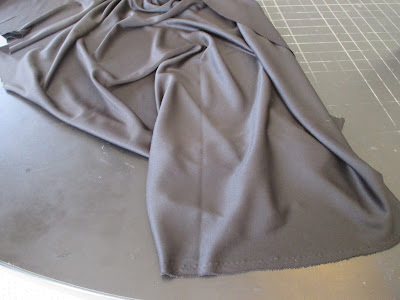
The fabric I used for the experiment was this.  Slinky and drapey, and with a substantial stretch in both directions (about 50%.)


The machine I used was my 401


And the stretch stitching "equipment" is this:

Now, I don't have this cute little plastic case for mine, I bought the foot and cam separately.  If you're looking for the same thing, it is the #22 cam (which looks like an inverted #8) and an overedge foot.  That's all it is. (This same combo is great for finishing seams with an overedge stitch.)

I used a Schmetz stretch needle and Guttermann 100% polyester thread.  And here are the results.  This stitched perfectly, no skipped stitches, no puckering, and I can stretch the seam without breaking any stitches.  Remember, the 401 doesn't have a built-in "back and forth" stretch stitch, so this is how it was done on a forward stitching machine.

This is how the stitch looks


Here is the front side


Now for hemming that stretchy knit with a twin needle.  My new best friend is Wonder Tape.  You don't want to try to press up or pin up this hem, but of course you want it to stay in place without shifting.  So you use this helpful product.

Tape it down with the bottom edge where you want your hem to be.


 Then you peel the paper backing off


and turn up your hem and press it into place


Now stitch with a twin needle and very light upper tension.  For best results, use a backing like tear-away or wash-away stabilizer, or even tissue paper like I'm using here.


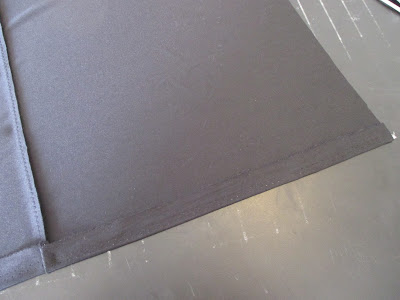
I did NOT use a stretch twin needle, just a universal.  Results might be even better with a stretch needle, though.  Anyway, between the Wonder Tape and the paper backing, there was no shifting or puckering of the fabric.


PS...  The 401 takes two separate needles, so if you don't have a stretch twin needle you can use two stretch needles in there instead.  I didn't think of that until after I did this.


*Keep in mind that this is a FORWARD ONLY "stretch stitch."  By that I mean that it isn't the kind of true stretch stitch made by later machines in which the stitch is made by a forward/reverse stitching motion.  Those kind of machines build the stretch right into the stitch and are the gold standard for stretch stitching.  Keep in mind that this is the only the best method for a forward stitch pattern.

Saturday, March 17, 2018

Fun with Singer Bias Cutter and Bias Binder

Here are a couple of really cool gadgets from the Singer Tool Box.  Top is the bias binder, and below its the bias gauge cutter.

Now imagine it is 1955, and we are going to cut and apply a bias edging.  First we have to cut the bias strips 15/16" to fit the binder attachment and we do it with this little device.


Before I go any further - Yes, I know there is a method where you can cut continuous bias strips after marking cutting lines and making a couple of seams in a bias cut piece of fabric.  I do that myself sometimes.  But for the fun of it, let's just assume we only need a short bias strip so we're going to cut and seam it the old-fashioned way.

First I'll mark off my first bias line, and cut it.

(And yes, I "cheated" and used the rotary cutter for the first line.)


Now I don't have to mark off any more lines to get perfectly even strips.  I just attach this gizmo to the tip of my scissors and cut.


That little square next to the B is where you set the gauge for how wide you want your strips to be.
F = facing,  B = binding, C = cording.  I have it on B to get the required 15/16" inch strips that work in the binding attachment.

You attach it to the tip of your scissors as shown above, then you insert the edge of the fabric in the slot and start cutting - the strips come out perfect!

(If you have a good eye, you'll see I had the gauge set a tad past the B so my strip is a full inch wide. Oops!)


To seam, line up your strips this way.  Then press the seam open and cut off the little points.


So now you put your strip into the largest slot on your bias binder, then attach it to the machine. (It is easier to do it that way.) Feed the edge of your fabric into the slot between folds and sew.


The binding attachment folds and sews it on in one step!


How cool is that?

A Guide to Some of the Most Popular Vintage Singer Sewing Machines PART II - The Slant-O-Matics


CONTINUED FROM PART I - The Classic Blacks.

Introduced by the revolutionary new slant shank 301 came the parade of Slant-O-Matics in the early 1960s.  Low shanks were still made at the same time (the Style-O-Matic and Fashion Mate lines, for example) but the Slant-O-Matics were Top of the Line and are the ones most people are interested in obtaining today.  With one exception, these were zigzag machines.


Singer 404 Slant-O-Matic


Singer 403 Slant-O-Matic


Singer 401 Slant-O-Matic


Singer 503 Rocketeer


Singer 500 Rocketeer


NOTE:  All the Slant-O-Matics shown here (except the 404) use top hat cams which are interchangeable.  There are 23 total that work on these machine numbered #0-#22.  Usually 6-8 of them came with the machines when new and may or may not be included with a used machine.   These, for example, are sold separately.

#22, stretch or overcast
#17, curlicue


You can often find a set of these on eBay that come in a box like this (for a 600 machine.)


MORE INFO ABOUT THE 400 MACHINES AND THE CAM SYSTEM HERE

MORE INFO ABOUT THE "NEXT GENERATION" OF SLANT-O-MATICS, THE 600 MACHINES, HERE

Tuesday, March 6, 2018

Singer 237 Fashion Mate, What a Surprise!


I picked this up in a thrift store for $24, including the cabinet.  I had some fixing up to do on it, since it was dusty, creaky, and barely sewed.  The swing needle mechanism was seized up and none of the levers would even move.  But I used the HOPE method (Heat, Oil, Patience, Effort) and guess what - this is one fine machine!

The 237 has a belt drive, and a vertical oscillating hook.  It is pretty basic, with just a few features:
  • Zigzag with four stitch widths
  • Three needle positions
  • Presser foot pressure adjustment
  • Some later models have a feed dog drop, but this one doesn't

Between the oscillating hook and the belt drive, I didn't expect this to be a particularly fast or smooth running machine.  It was a "bargain basement" model, I think it sold for only $88 brand new.  But hey - this has all metal gears and the hook system is similar to the exquisitely engineered Class 15 machines.  Once I got it running, I was blown away by how beautifully it sews; so fast and smooth, with perfect stitching.  In fact, it does one of the best satin stitches of any machine I've ever seen, and it's almost worth getting it for that reason alone.  For the first time EVER, I've found myself making manual four-step buttonholes just because I can!


Here's a quick step-by-step video of how I do it with a buttonhole foot.  (And pay attention to what a smooth-stitching machine this is!)


Beautiful satin stitching, second to none


What's ironic, is that these machines are literally everywhere, but no one pays them much mind.  Every thrift store, every Goodwill auction, every garage sale in town, you'll see the humble Fashion Mate 237 getting picked over.  Mostly they are ignored because they're not glamorous and don't have a gimmick.  Who gets excited about an old bargain basement machine from 1970?

Well, if you sew on one of these, you'll find out.  Out of the many vintage Singers I've sewn on (see a partial list to the right of this page) this is among the best.  Surprise, surprise!

I'm not kidding, next time you see one of these at the thrift store, get it!  I'll warn you, it weighs a ton (it's NOT portable) but it sews like a champ.  I thought I'd fix it up and sell it, but this machine isn't going anywhere, it stays with me!


PS...If you're not used to threading a removable bobbin case like this, I guess it can be kind of tricky.  If you're used to threading a 15-91 or 221, you'll find this the OPPOSITE of what you're used to.